
Setting up a testing environment to test Android Ethernet 802.1x requires a combination of hardware and software configurations. Below are the steps to create and configure the environment:
Hardware Requirements
- Ethernet switch with Radius configuration capability
- Android device with Ethernet 802.1x integrated
- Authentication server (PC with Ubuntu OS 18 or above installed)
- Router
Software Requirements
- FreeRadius server (Need to install and configure in Authentication server)
Overall connection diagram is shown below.

Note: Here TPLink TL-SG2210 switch is used. You can use any of switch with Radius configuration capabilities.
As per above diagram, switch is center part. Android device with 802.1x integrated, Ubuntu with freeRadius configured and Router are connected to Switch. Router provide IP address to Switch and Ubuntu machine. Android device will get IP address once it is authenticated with Radius server.
Ubuntu Configuration
Install and configure freeRadius
Go through below link and install & configure freeRadius server on Ubuntu.
https://cloudinfrastructureservices.co.uk/radius-server-linux/
Generate SHA256 certificates
Skip these steps if you already have certificates.
- Open the terminal and set path to “/etc/freeradius/3.0/certs”.
- Open the file ca.cnf through vim. Change below parameters’ values. (input_password and output_password must be same)
- default_md = sha256
- input_password = <your_password>
- output_password = <your_password>
- countryName = <mention_your_country_in_same_format>
- stateOrProvinceName = <mention_your_state_province_in_same_format>
- localityName = <your_city>
- Open the file client.cnf through vim and change same parameters metioned in point 2 and keep same values.
- Open the file server.cnf through vim and change same parameters mentioned in point 2 and keep same values.
- Execute “make” command in terminal on path “/etc/freeradius/3.0/certs”. It will generate certificates on same path.
- Copy server.pem and ca.crt(ca.pem) files to ““/etc/ssl/certs” path.
- Copy server.key file to “/etc/ssl/private” file.
- Push ca.pem and client.p12 files to Android device to install and configure 802.1x connection.
Configure EAP
- Open terminal and set path to “/etc/freeradius/3.0/mods-available”.
- Open the eap file through vim.
- If you would like to set TLS authentication method then change below parameters.
- default_eap_type = tls
- timer_expire = 60
- private_key_password = <your_certificate_password>
- private_key_file = /etc/ssl/private/server.key
- certificate_file = /etc/ssl/certs/server.pem
- ca_file = /etc/ssl/certs/ca.crt
- If you would like to set PEAP authentication method then change below parameters.
- default_eap_type = peap
- timer_expire = 60
- private_key_password = <your_certificate_password>
- private_key_file = /etc/ssl/private/server.key
- certificate_file = /etc/ssl/certs/server.pem
- ca_file = /etc/ssl/certs/ca.crt
- default_eap_type = mschapv2 #// Inside peap section
- If you would like to set TTLS authentication method then change below parameters.
- default_eap_type = ttls
- timer_expire = 60
- private_key_password = <your_certificate_password>
- private_key_file = /etc/ssl/private/server.key
- certificate_file = /etc/ssl/certs/server.pem
- ca_file = /etc/ssl/certs/ca.crt
- default_eap_type = mschapv2 #// Inside ttls section
Add Switch client
- Open terminal and set path to “/etc/freeradius/3.0”.
- Open client.conf file through vim. Add below lines before “# IPv6 Client” line.
client switch_client {
	ipaddr = <your_switch_ip>e.g.192.168.0.100
	secret = <switch_password>e.g. testing123
}
Additional Changes for TTLS
Make below changes in “/etc/freeradius/3.0/mods-avialable/eap” file.
- Change default_eap_type to ttls.
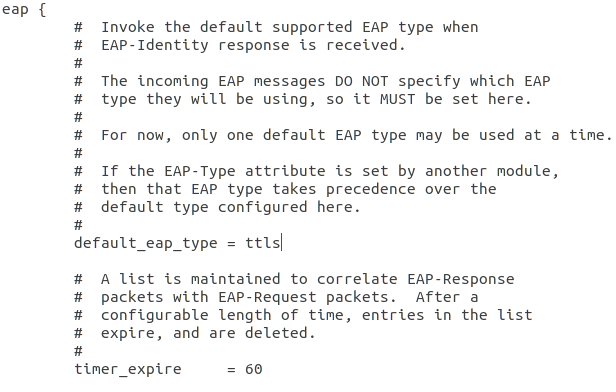
- Change values in ttls section as per below.
ttls {
tls = tls-common
default_eap_type = mschapv2
copy_request_to_tunnel = yes
use_tunneled_reply = yes
virtual_server = "inner-tunnel"
# include_length = yes
# require_client_cert = yes
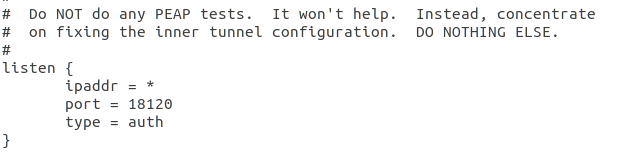
}Make below changes in “/etc/freeradius/3.0/sites-enabled/inner-tunnel” file.
- Changed ipaddr value to *.
Make below changes in “/etc/freeradius/3.0/nods-config/files/authorize” file.
- Added below line at end of file.
<username(Identifier)> Cleartext-Password := "<password>"Switch configuration
Enable 802.1x
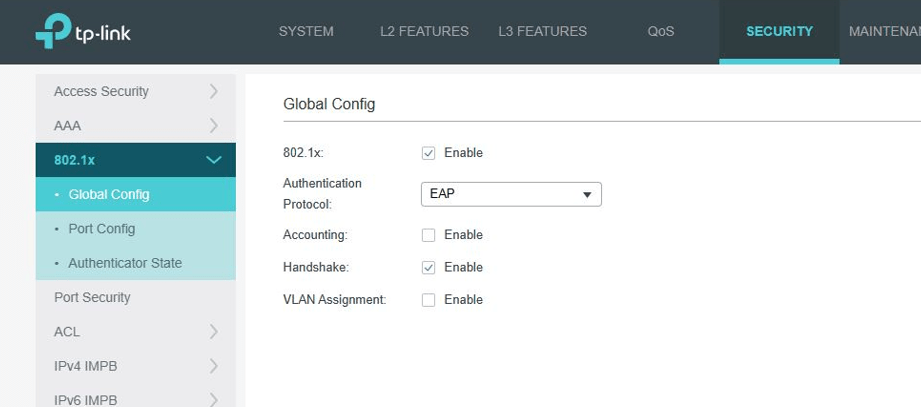
Enable 802.1x as shown in above diagram.
Add Radius server details
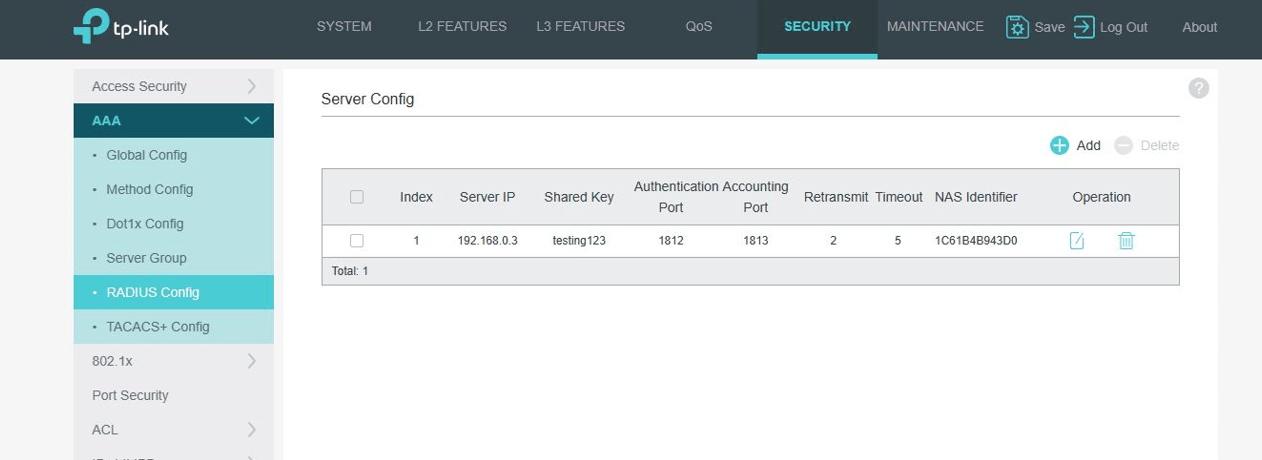
Add Radius server details as shown in above diagram. As per connection diagram, server IP is 192.168.0.101.
Configure port settings for Android device
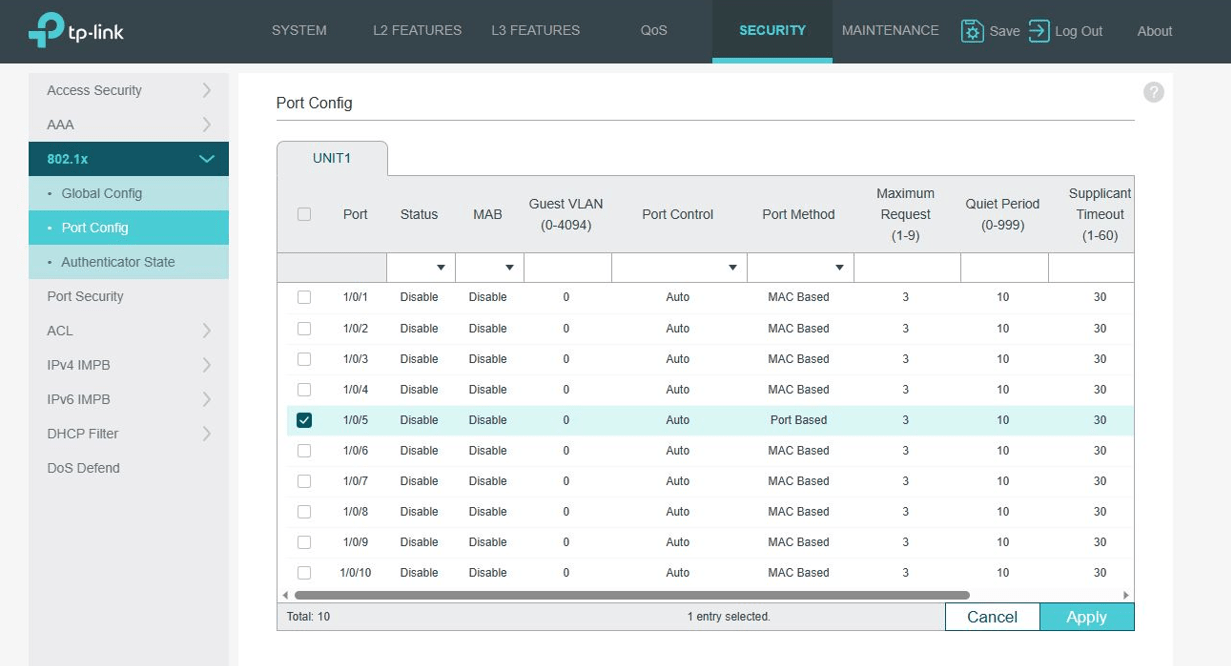
Note: In above diagram, port no. 5 is configured for Android device. You can select any empty port except Router and Ubuntu machine ports. Port method should be “Port Based“, Quiet Period should be set to 10 and Supplicant Timeout should be set 30.
Time for action
Start Radius Server
Start Radius server on Ubuntu by executing “freeRadius -X” command. It will start listen to incoming connection request for authentication.

Configure Ethernet802_1x application on Android device

Ethernet802_1x application supports TLS, TTLS and PEAP authentication methods. You can install and select CA and User(Client) certificates.
Install ca.pem and client.p12 certificates, mention identity and certificate password.
Here identity is what we have mentioned in input_password in radius configuration on Ubuntu.
Once configurations are completed, press CONNECT button to make connection.
Final Operation
On press CONNNECT button, Android device send authentication request to Switch. Switch will communicate with Radius server configured on Ubuntu machine for possible authentication. Once authentication is successful, Android device raise DHCP request and get IP address from Router.


Leave a Reply to Dae Hee YooCancel reply